Function Workflow Handler
In this guide, you will construct a Python Function Workflow Handler that uses a custom container image. The Python function uses sample code that can be updated with custom code to run within the Workflow Handler. The function workflow handler will run a prebuilt Docker image which contains the Python function.
Assumptions
This exercise assumes that you have access to the following:
- Access to a Rafay Org with Org Admin privileges
- A running GitOps agent
- RCTL installed and configured
- Docker installed on your machine (Windows or Linux or macOS)
- A Docker Hub account
Step 1: Download Files
In this step, you will download and extract a ZIP archive which contains the sample Python function and supporting Dockerfile to build the image.
- Download the archive function-wfh.zip
- Extract this archive on your local machine
You will use these files in the subsequent steps.
Step 2: Build Image
In this step, you will use Docker to build the Workflow Handler Image and push it to DockerHub. The image will be used by the workflow handler in subsequent steps.
When developing a Python function, be sure to use the following folder structure:
my-function/
├── Dockerfile # Docker build file
├── main.py # Entry point (starts SDK server)
├── requirements.txt # Root dependencies (SDK, etc.)
└── function/ # Your function code
  ├── __init__.py # Empty file (required)
  ├── handler.py # Your handle() function
  ├── requirements.txt # Your function dependencies (optional)
  └── utils.py # (Optional) Your custom modules
In the previously extracted archive, you will see the above folder structure and populated files. Note, the handler.py and utils.py files contain the custom function code. The handler.py uses the variables "action" and "user" which are pulled from the environment instance execution. Additional variables can be pushed from the environment in the same manner.
- On your command line, navigate to the previously extracted python-function directory
- Run the following command to build the image being sure to update the username with your Docker Hub username
docker buildx build --no-cache --platform=linux/amd64 -f .\Dockerfile -t <DOCKER_USERNAME>/python-function-wfh:1.00 . --push
Step 3: Create Workflow Handler
In this step, you will create the Workflow Handler. The workflow handler will point to the previously created container image. The workflow handler will be used by a resource template created in later steps.
Important
Be sure to update any resource names with a unique name to prevent conflicts within the organization
- In your extracted archive from step 1, navigate to the function-wfh directory
- View the file named wfh.yaml in this directory
- Update the Docker Username and any fields to match your environment if different names were used and save the file
apiVersion: eaas.envmgmt.io/v1
kind: WorkflowHandler
metadata:
  name: python-function-gs
  project: system-catalog
spec:
  config:
    function:
      image: <DOCKER USERNAME>/python-function-wfh:1.00
      language: python
      name: python-gs-function
      skipBuild: true
      targetPlatforms:
      - linux/amd64
    type: function
status: {}
- Run the following command to create the WFH in the controller
rctl apply -f wfh.yaml
- In the console, navigate to Environments -> Workflow Handlers to see the newly created resource

Step 4: Create Resource Template
In this step, you will create a resource template. This resource template points to the previously created workflow handler.
Important
Be sure to update any resource names with a unique name to prevent conflicts within the organization
- In your extracted archive from step 1, navigate to the function-wfh directory
- View the file named rt.yaml in this directory
- Update any fields to match your environment if different names were used and save the file
apiVersion: eaas.envmgmt.io/v1
kind: ResourceTemplate
metadata:
  name: python-function-gs
  project: system-catalog
spec:
  provider: custom
  providerOptions:
    custom:
      tasks:
      - name: python-function-gs
        onFailure: unspecified
        options: {}
        type: workflowHandler
        workflowHandler:
          name: python-function-gs
  version: v1
  versionState: active
- Run the following command to create the resource template in the controller
rctl apply -f rt.yaml
- In the console, navigate to Environments -> Resource Templates to see the newly created resource

Step 5: Create Environment Template
In this step, you will create an environment template. Note that this references the resource template from the prior step.
Important
Be sure to update any resource names with a unique name to prevent conflicts within the organization
- In your extracted archive from step 1, navigate to the function-wfh directory
- View the file named et.yaml in this directory
- Update the Agent Name and any fields to match your environment if different names were used and save the file
apiVersion: eaas.envmgmt.io/v1
kind: EnvironmentTemplate
metadata:
  name: python-function-gs
  project: system-catalog
spec:
  agents:
  - name: <AGENT NAME>
  resources:
  - kind: resourcetemplate
    name: python-function-gs
    resourceOptions:
      version: v1
    type: dynamic
  variables:
  - name: action
    options:
      override:
        type: notallowed
    value: $(trigger.payload.type)$
    valueType: expression
  - name: user
    options:
      override:
        type: allowed
    valueType: text
  version: v1
  versionState: active
- Run the following command to create the resource template in the controller
rctl apply -f et.yaml
- In the console, navigate to Environments -> Environment Templates to see the newly created resource

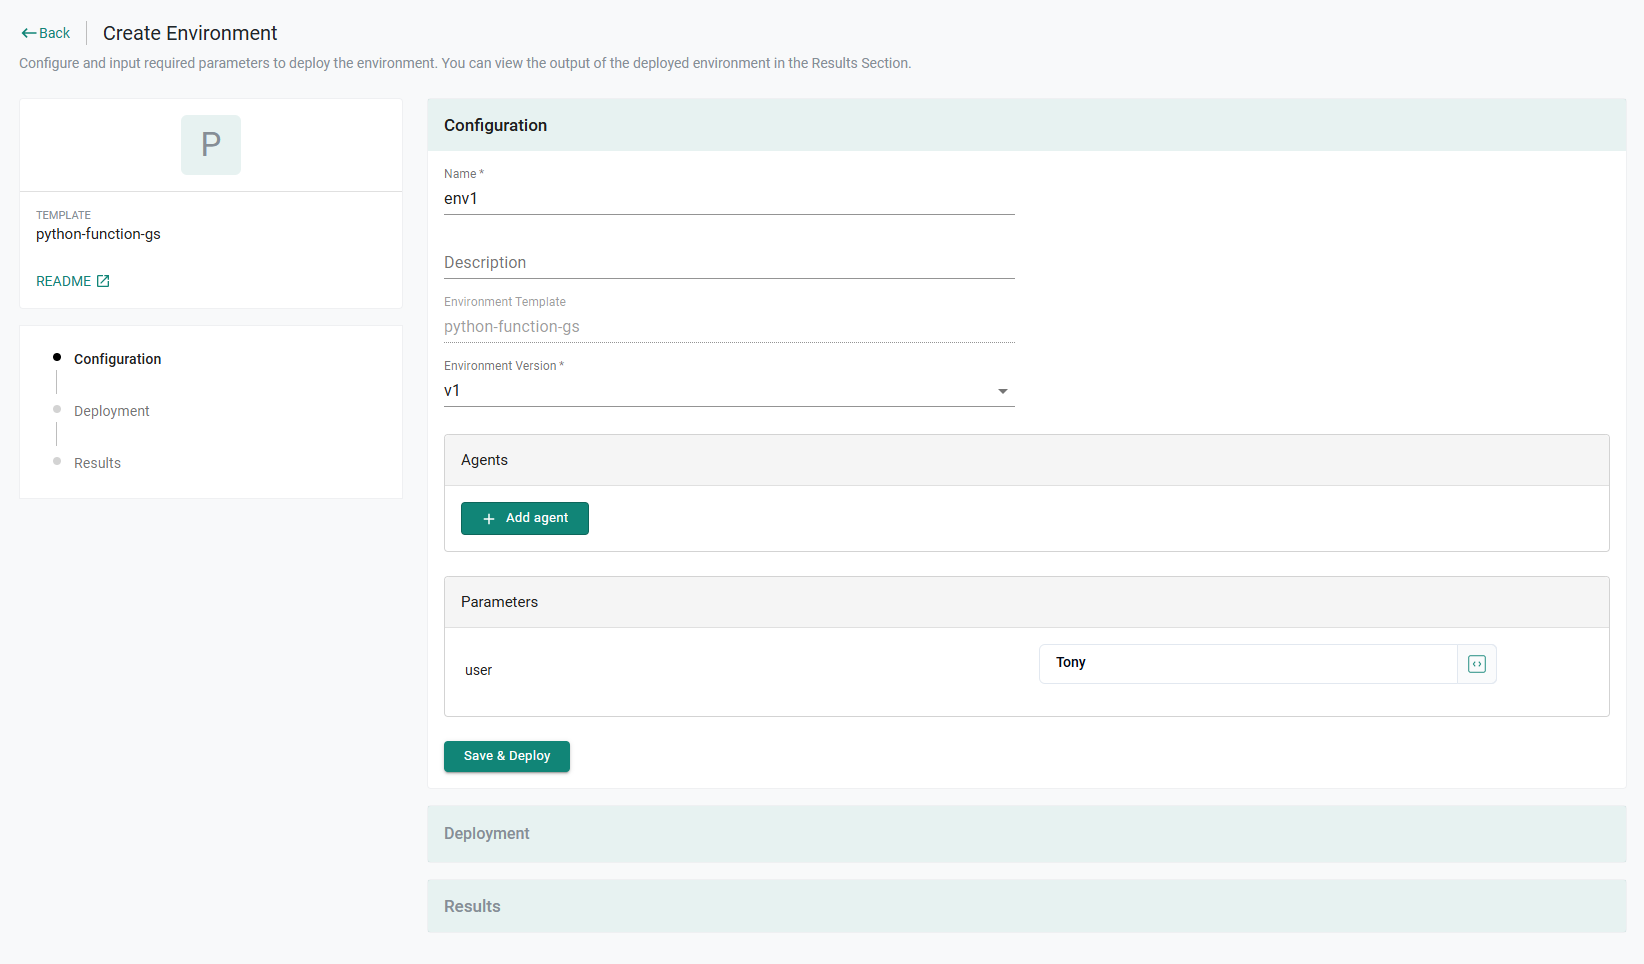
Step 6: Create Environment
In this step, we will create an environment using the newly created environment template. The environment will execute the workflow handler referred to by the resource template. In this step, we will validate the successful run by reviewing the log of the environment run. As part of our Python function code, we are printing the the "host" variable. These should be visible in the screen.
- In your project, navigate to Environments -> Environments
- Click Launch on the previously created environment template card
- Enter a name for the environment
- Enter a value for the user parameter
- Click Save & Deploy
After a few minutes, the environment run will have completed.
- Click Show near Activities (Recent Runs)
- Expand group.python-function-gs.custom.python-function-gs
You will see the user variable printed in the log according to the logic defined in the Python code.

Recap
In this guide, you created a Python function workflow handler and the supporting environment manager templates. You then deployed an instance of an environment based on the newly created environment template.