Getting Started with Jira Workflow Approval
Overview
This guide explains how to use the Jira Workflow Approval catalog to enforce approval-based gating in resource provisioning workflows. It helps administrators integrate Jira approval steps into automated infrastructure deployments.
Approval Workflow Execution
A Jupyter Notebook template is used in this guide as an example to demonstrate how the Jira Workflow Approval works. When the workflow handler is attached to an environment template, it automatically triggers upon launch and creates a Jira ticket for approval. Provisioning proceeds only after the ticket is approved.
The same process applies to any environment template where approval-based gating is required.
Prerequisites
Before proceeding, ensure the following:
- A Jira instance is accessible with a valid FQDN
- A Jira project is set up to receive approval tickets
- A Jira user account with API token access is available
- Approval states (e.g., Approved, Denied) are clearly defined
Initial Setup
This involves selecting an environment template, configuring the workflow handler, and sharing both with the appropriate project for end-user access.
sequenceDiagram
    participant Admin as Platform Admin
    participant Catalog as System Catalog
    participant Project as End User Project

    Admin->>Catalog: Selects Environment Template from System Catalog
    Admin->>Catalog: Selects Jira Workflow Approval Handler from System Catalog
    Admin->>Project: Shares Environment Template and Workflow Handler
    Project-->>Admin: Templates Available in End User's Project
End User Flow
When the end user deploys the shared environment template, the attached workflow handler triggers a Jira ticket. Provisioning proceeds only after the ticket is approved.
sequenceDiagram
    participant User as End User
    participant Project as Rafay Project
    participant Jira as Jira System

    User->>Project: Launches Environment Template
    Project->>Jira: Creates Approval Ticket
    Jira-->>User: Provides Ticket URL
    User->>Jira: Approves or Declines Ticket
    alt Approved
        Project->>Project: Proceeds with Environment Provisioning
        Project-->>User: Environment Status = Success
    else Declined
        Project-->>User: Environment Provisioning Blocked
    end
Part 1: Create Jupyter Notebook Template
To begin, create a Jupyter Notebook:
- As an Org Admin, go to Template Catalog
- Select the AI/ML tab and choose the Jupyter Notebook
- Click Get Started
- Provide the following details:
- Provide a name and version name (e.g.,
1.0) - Select a project (e.g.,
defaultproject) - Click Continue
- Provide a name and version name (e.g.,

The Environment Template page appears, allowing users to provide the required inputs and deploy the notebook. Refer to the Jupyter Notebook Deployment page for detailed steps on how to deploy a notebook.
Part 2: Share the Jira Workflow Approval Handler
Step 1: Select the Jira Workflow Approval Template
- From the Template Catalog, select the Workflow Helpers tab, choose the Jira Workflow Approval catalog, and click Get Started
- Provide the following details:
- Provide a name and version name (e.g.,
1.0) - Select a project (e.g.,
defaultproject) - Click Continue
- Provide a name and version name (e.g.,

This navigates to the Workflow Handlers page, which displays the default labels and annotations under General section as shown below.

Step 2: Configure the Jira Integration
- In the Workflow Handler page, click Configuration to provide the required input values needed to configure the Jira integration and click Save

Input Variables for vCluster System Template
| Name | Value Type | Description |
|---|---|---|
| debug | Text | Enables verbose logging for troubleshooting purposes |
| configuration_fqdn | Text | Fully qualified domain name of the Jira instance |
| configuration_api_user | Text | Username used to authenticate API requests to Jira |
| configuration_api_token | Text | API key used to authenticate requests to the Jira server |
| configuration_approved_state | Text | Jira ticket status that indicates the request has been approved |
| configuration_denied_state | Text | Jira ticket status that indicates the request has been denied |
| configuration_project | Text | Jira project name |
| short_description | Text | Short summary of the resource request |
| description | Text | Detailed description of the resource request |
| assignee | Text | User to whom the Jira ticket is assigned |
| priority | Text | Priority level for the Jira ticket |
!!! note: Ticket Approval and Denial States
The Jira workflow handler checks the status of the ticket to determine whether to proceed with resource provisioning. The following variables must be configured:
- configuration_approved_state: Status value (e.g., Approved, Done) that indicates approval.
- configuration_denied_state: Status value (e.g., Rejected, Cancelled) that indicates denial.
These values must match the exact status strings used in the Jira project's workflow. Mismatched or incorrect values may result in the ticket not being recognized as resolved, blocking further actions.
Once the changes are complete, users can view the workflow handlers list.

Part 3: Attach the Jira Workflow Handler to an Environment Template
- Navigate to Environment Templates to attach the Jira Workflow Handler as a hook to the notebook environment template created in Part 1 (e.g.,
jupyter-workspace-init)

- Click the Edit icon for the selected environment template and go to the Hooks section
- Click + Add Hook
- Enter a name for the hook and select the hook type as Workflow Handler
- From the list of available workflow handlers, choose the one created in Part 2 – Step 2
- Provide the other details as required and click Save Changes
- Click Save as Draft or Save as Active

💡 Recommended: Enable Skip On Destroy
It is generally recommended to enable Skip On Destroy when configuring Jira workflow handlers in self-service scenarios.
Enabling this option ensures that the workflow handler is triggered only during environment provisioning and not during deletion. This prevents unnecessary approval requests or ticket creation when an environment is being removed.
For specific use cases where notification or tracking during deletion is required, this option can be left disabled. In such cases, a ticket may be generated to inform stakeholders about the environment termination.
This setting should be reviewed based on the expected behavior during the destroy phase of the environment lifecycle.
Part 4: Launch the Notebook Template
- Navigate to Environments and launch the Jupyter Notebook created in Part 1
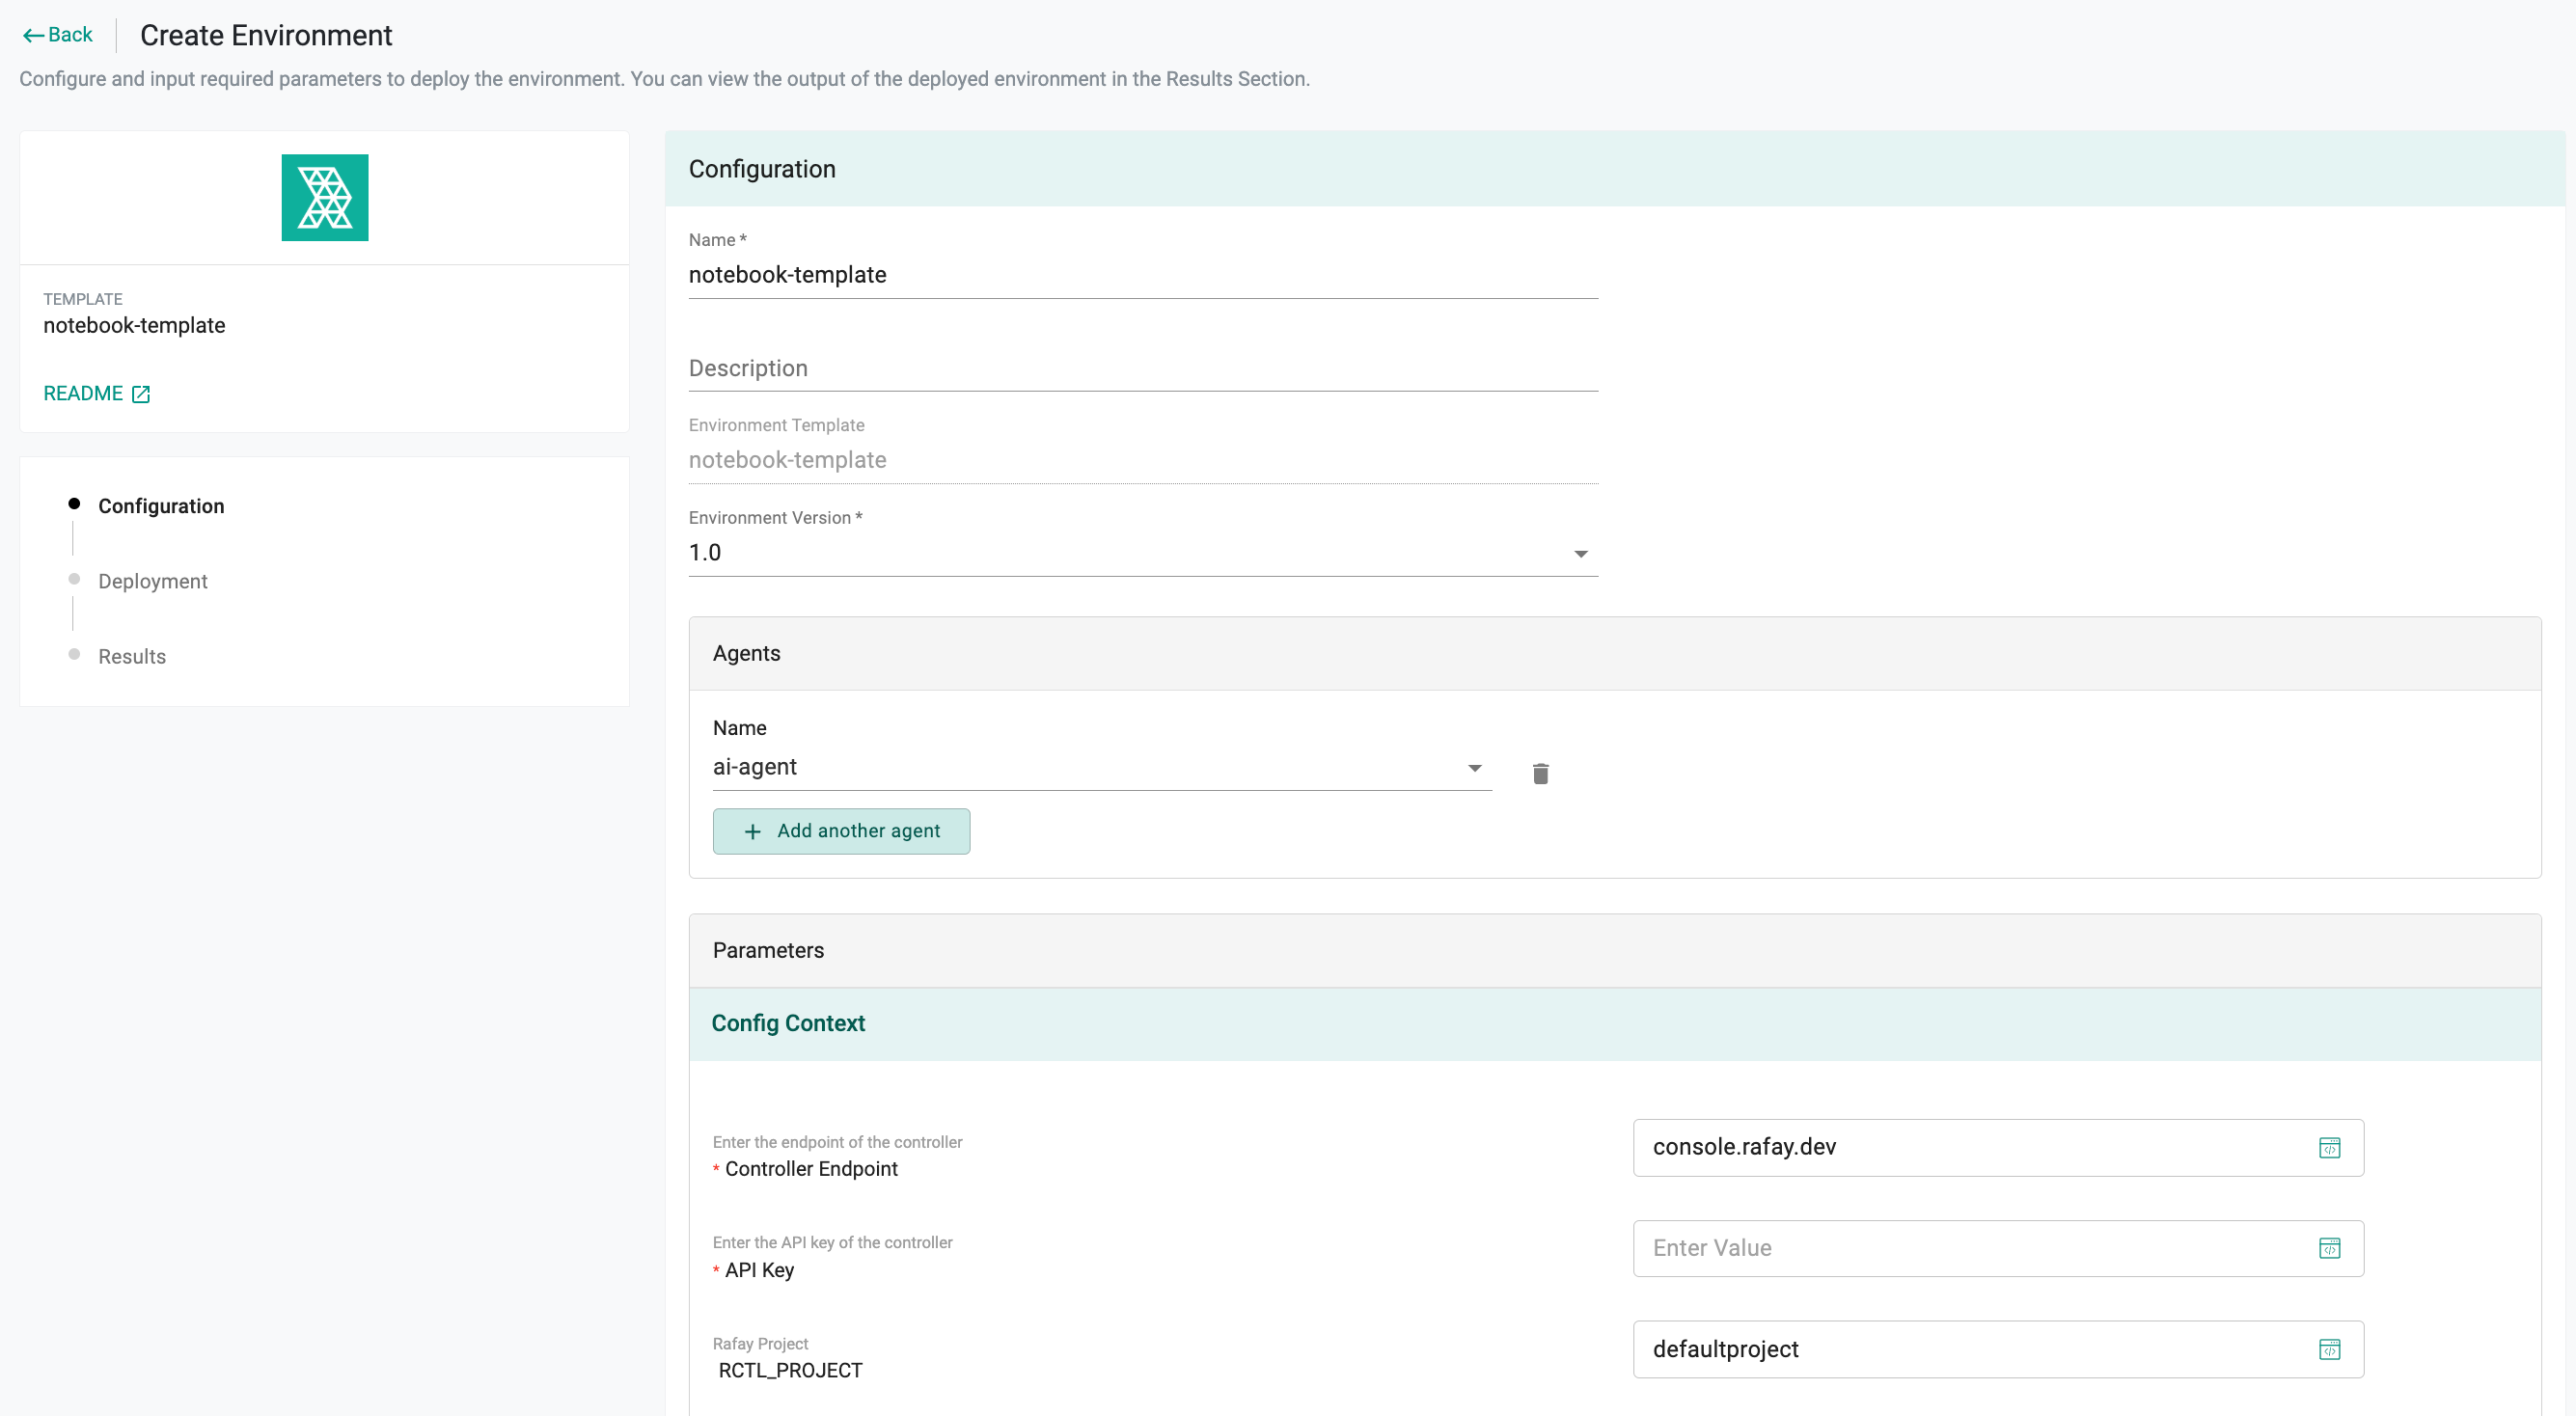
- Provide a name and, optionally, a description
- Select an active agent from the dropdown
- Enter the cluster name and API Key

- Click Save & Deploy
- The initial status is Pending and changes to Waiting for Approval

An output is displayed with the Jira link and ticket_number.
- Copy and paste the Jira link, then approve or decline based on the requirement

- Once approved, the remaining activities take place and the environment is successfully created with the status shown as Success

If declined, the remaining activities will not proceed.